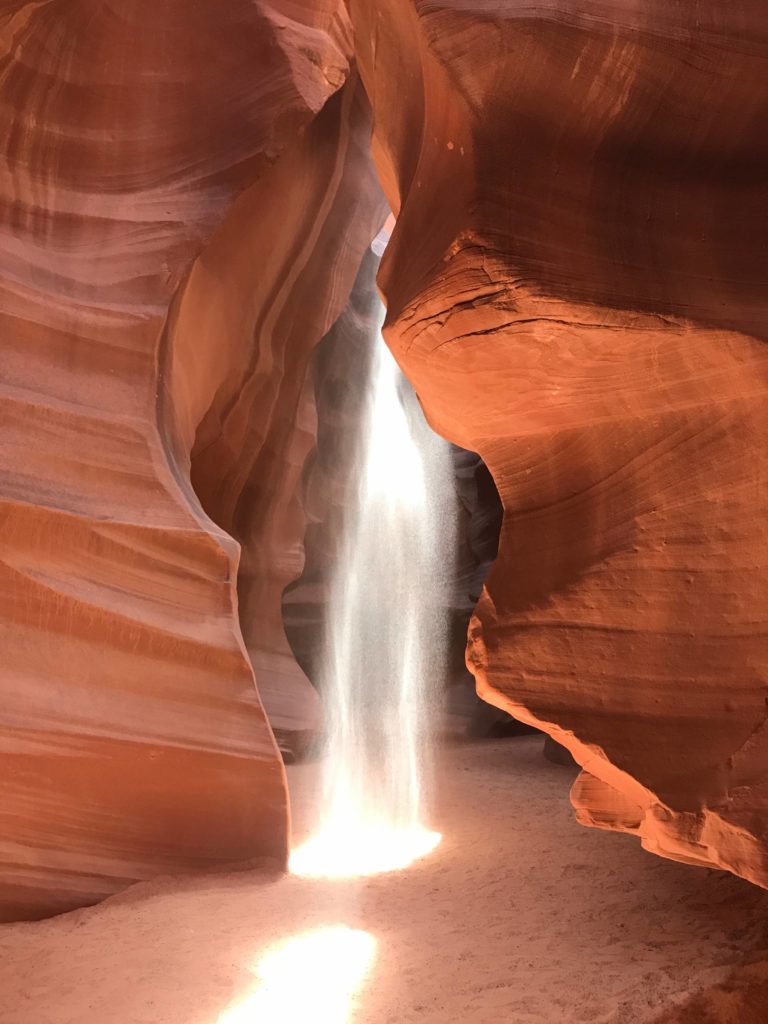
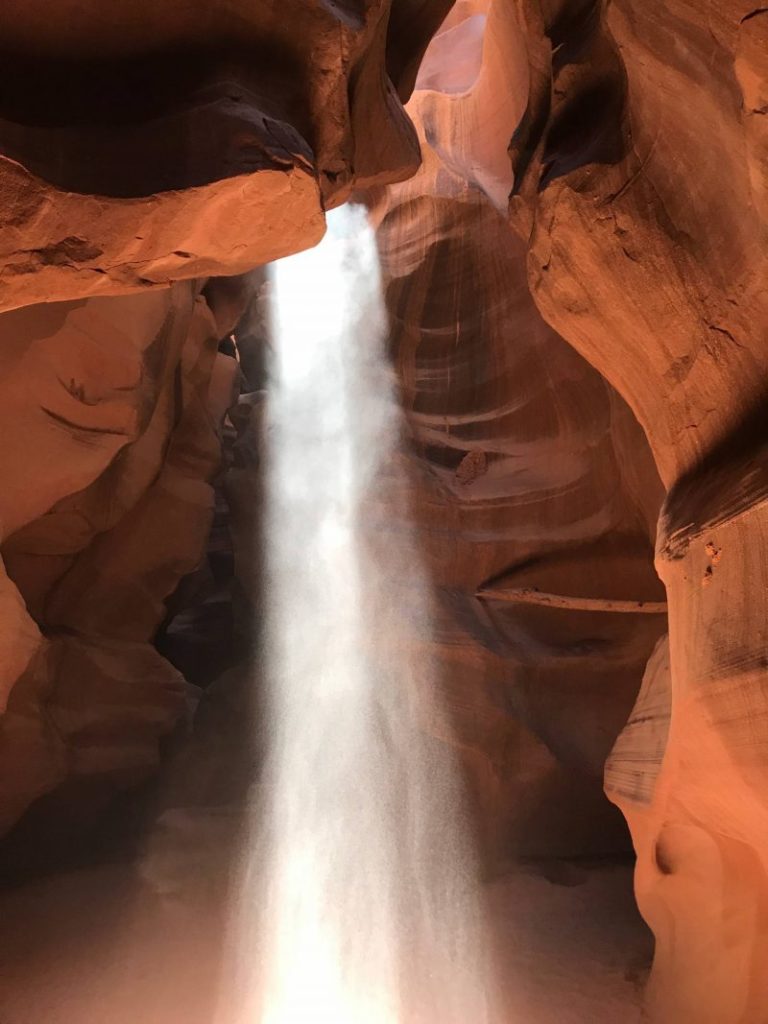
Antelope Canyon is one of the most picturesque locations in the world. With sweeping curves, sunbeams and sand showers, it looks like something out of a daydream. Photographing Antelope Canyon is a goal for photographers both budding and seasoned.
Located in Lake Powell Tribal Park in Page, Arizona, you can only access this Navajo site with a designated guide. There are two canyons, Upper and Lower Antelope Canyons, but the photo tours and coveted sunbeam shots are only available at Upper Antelope Canyon.
Those with a passion for photography should opt to take a photo tour. While more expensive, you’re guaranteed great shots. Most tour attendees are serious photographers that are looking to sell their photos and make multiple visits to capture different lighting.
If you’re heading to Page with a camera in hand, here are some things you need to know to ensure success in photographing Antelope Canyon.
Weather and timing

The unforgettable moment in Antelope Canyon is when you see sunbeams shine in through the slot canyon for the first time. This occurs between 11am and 1pm in the spring and summer months. If you’re going in March, make sure you go after the spring equinox. Otherwise, the sun does not rise high enough to shine in to the Canyon.
If you are able to, reserve a 10:30am photo tour, ensuring that you’re in place for optimal light. Those hoping to see lower Antelope Canyon in the same day should schedule their visit for after Upper Antelope Canyon, not before, since you’ll be able to enjoy Lower Antelope Canyon regardless of the time of day.
Reservations

There are several different photo tour operators that take you in and around Upper Antelope Canyon. I went with Adventurous Antelope Canyon Photo Tours and the experience was $130 for two hours, which includes a half hour of transportation and an hour and a half in the canyon. I booked online and chose this company ultimately because of the reviews. I read that they assisted photographers with camera settings and, being new to the photography game, that was worth a little extra for me.
>>> Upper Antelope Canyon Tours
>>> Lower Antelope Canyon Tours
You’re not allowed to use flash and have to utilize the manual setting to get the best shots. This requires playing with the aperture and exposure settings so it’s best to have an expert on board to help. Note that your mobile device can take great photos as you’re walking, or if you choose to go on a regular walking tour. The guides take pictures all day and know the best spots.
In addition to your photo tour cost, you also have to pay an $8 entry fee for Lake Powell Tribal Park.
Required equipment

To participate in a photo tour you need, at a bare minimum, a tripod and DSLR camera. You’ll also want to bring a rain sleeve or ziploc bag of some sort to protect your camera while moving around inside the canyon since it’s really dusty. Personal bags and purses are not allowed in the canyon so you’ll have to bring your camera already mounted on your tripod. You’re allowed to bring water but no other food or beverage is permitted. There are no trash cans so please don’t litter. Also, bring a tip for your guides since they go above and beyond to make sure you have a great experience.
While it isn’t recommended that you change lenses in the canyon because of the dust I mentioned, you should have a device ready to clean your camera if necessary. Some had lens wipes, others had a rubber squeeze air blower. Chances are you’ll need to use (or borrow) at least one of the two.
Antelope Canyon Photo Permits

If you plan on selling your photos or posting them online on a blog, you need to get a photo permit directly from Navajo Parks Management. It’s $50 ahead of time and you have to pay by mailing in cash or a money order. If it’s later discovered you sold a photo or otherwise profited without acquiring the proper permit first, it’s $200 to purchase a permit retroactively.
I had luck corresponding with Shaina Begay, Office Assistant at the park, and received my permit within a week of mailing in payment. The phone number is 928-698-2808.
Photographing Antelope Canyon

The best part of a photo tour is that you pay to keep people out of your pictures. As photographers, you get top priority for the best shots. You set up in two rows, with long and short tripods, and when the time comes for that perfect sunbeam shot you get two minutes to capture it, during which all other tour groups are held back so that you can get empty pictures of the canyon.
Be prepared to move your tripod at a minute’s notice, that’s why you go in with it already mounted. Also, you may have a passerby or two trying to take shots over your shoulder–just tell your guide and they’ll take care of it. It can be a tense atmosphere with so many people invested in getting money-making or award winning pictures. Try to go in with a positive and flexible attitude.
There will be plenty of time for you to get every picture, so don’t worry about missing out if you’re broken into groups. Beware falling sand, as the guides usually throw it in the air so you can catch the particles glimmering in the sunlight on their way down.
Upper versus Lower Antelope Canyon

The biggest pro to the photo tour, as mentioned, is having the ability to take shots of the canyon undisturbed. The downside is that, if you’re looking for photos that include you, this is not the right tour. This is more for landscape and scenery shots rather than portraits. Also, given the popularity of the site, it can feel crowded. Many guests actually prefer to visit Lower Antelope Canyon for a more relaxed visit.
Credit to Jen, from jenonajetplane.com
Please contact us for removal if there is any copyright infringement.


